Love is caught in crystal

Love is caught in crystal

The February challenge for Creative Loops is hearts– perfect for a Valantine’s Day card. I decided to attempt the caught in crystal technique for the first time and although I was happy with the results there is room for improvement on my next try!

Heartcaughtincrystal2

I used my Indigo Blu poppy heart stamp and Blazing Poppies stamp with Versamark Watermark Ink
on Heat Resistant Acetate and I heat embossed using WOW! Blue Pearl Embossing Powder. I then started painting from light to dark on the images. I started with the highlights on the poppy using Acrylic Pearl Liquid in Volcano Red.
I then mixed two shades of Daler Rowney acrylic redsto paint the mid and shadow areas. The lighter areas are more sparkly in real life and of course the acetate adds some shine. Although I used the mid shade behind the edges of the pearlescent areas I would have liked to achieve a more subtle blend so I’ll have to play further to see if that is possible. I used Pebeo pearlescent green and Daler Rowney Graduate Acrylics for the leaves and am happier with the blending I achieved here.

Heartcaughtincrystal3

Once dried I added Pledge Klear Multi-surface waxand used Spectrum Noir Aquatints to get a blend of colours. I also added some Glamour Dust Glitter which is difficult to see in the photos. I went for shades of red but the differences were quite subtle once they all mixed and didn’t show up as well as I’d have liked. Greens or contrasting colours may have been better. I also wonder if I used too much of everything.

I crumpled up my tissue paper and splodged it on to the Pledge paint mix making sure it was saturated. I left it to dry overnight.

I attached it to the metallic blue mat using Screw Brads. I embossed the sentiments from the Phill Martin Baroque Every Day Corner range onto the mat corners. I coloured the card edges with Peeled Paint distress ink and then embossed metallic green card with my Tattered Lace Fretwork Lace embossing folder.

Heartcaughtincrystal1I would like to enter the following challenges

Creative Loops challenge– Hearts, love etc.

Creative Playground Challenge– Show us your heart

Pattie’s Creations Challenge– Love is in the air

Cuttlebig mania– I {heart} you

Stampin’ Royalty Challenge– Sparkle and shine


28 ideas you will love for our Valentine challenge of hearts.

28 ideas you will love for our Valentine challenge of hearts.

Creative loops challenge hearts valentine loveToday I’ve got lots of inspiration for our February challenge- hearts. The challenge topic (hearts) just needs to be a starting point for your inspiration so you could do a creative project with hearts or love or valentines or red….anything you think is linked to hearts.

The Creative Loops challenge is for all types of creatives and is truly anything goes- art, mixed media, sewing, knitting, card making, papercraft, crosstitch, photography, altered art, creative writing, graphic design……if it is creative and inspired by the challenge theme you can join in. The idea is to connect and inspire creatives. We are a local group that meet weekly but anyone is welcome to join the challenge and link up their project.

Feel free to add any ideas and to chat about inspirations in the comments. Here is an inspiration board of ideas you could use with the links listed below.

Please add your finished projects at the bottom of this post.

Creative loops challenge hearts

  1. Valentine Skirt- adding heart pockets to a skirt
  2. Heart mini quilt
  3. Love..a sewn work in progress
  4. Crazy quilt heart patch
  5. Heart applique cushion (no instructions)
  6. Heart crochet slippers
  7. Knitted heart coasters
  8. Needle felted heart
  9. Crochet heart strings
  10. Crochet floral heart
  11. Weaving heart baskets
  12. Watercolour heart art for children (and adults too!!)
  13. Colour bursting heart- art by Debra Wenlock
  14. Dictionary heart art by Madame Memento
  15. Pan pastel on tissue paper- mixed media art
  16. Photography- heart bokeh effect
  17. Armfuls of love picture from anabeliahandmade
  18. Mixed media playing cards
  19. Heart shaped merengue cookies
  20. Heart shaped cinnamon buns
  21. White chocolate raspberry cheesecake
  22. Paper quilled heart
  23. Heart string art
  24. Heart wire bangle
  25. 3D open up heart card tutorial
  26. Shabby chic floral card
  27. Bunting card (no instructions)
  28. Perfect love one layer card

A mix of ideas to inspire you. Now all you need to do is

  1. Get inspired
  2. Create (original and new creations only, please respect copyright)
  3. Take photos of your creation
  4. Link up
  5. Check out the other linked projects, comment on them etc. We want to build a community.

If you have a blog please write about your inspiration, how it links to this challenge and include a link to this post. Add a photo of your project with your name and a short description below. If you do not have a blog post you can upload and share your photo or email me a copy of the photo and details. If you have any problems linking up there is a how to video and tutorial here.

 Loading InLinkz ...

New baby scrapbook page

Hi!

Today I am still following the Creative Loops challenge theme of ‘new’ by trying something new with a scrapbook page for a new baby. I used Craft Artist to create the page digitally. I decided on some lovely spring colours. I love making scrapbook pages to frame for special occasions.

New baby scrapbook page

I must get back to posting more regularly- I think I might have lost a lot of the lovely people who used to visit and comment 🙁 Maybe it is the change of blog name and the fact the comments aren’t as obvious in the new blog layout too.

I would like to enter the following challenges

Open Minded Crafting Fun Challenges- Try something new

CRAFT challenge- not a card

Crafting With An Attitude- anything goes

Scrap and Craft- New Beginnings


Trying something new- cake decorating

Trying something new- cake decorating

Good morning peeps,

This is the second project I did for the Creative Loops challenge. The theme is ‘new’ so this is a bit of a creative departure for me. I think this is the third cake I’ve tried to decorate in my life so I hunted around on Pinterest for some inspiration. I had spotted this cake when I was researching inspiration for the main challenge post

Original inspiration by Nathalie1970 on cake central

As usual I had a quick hunt round for ideas based on stars ecploding from a cake and popped them n a Pinterest board. Once I had decided on the style I wanted I found a couple of tutorials and gave the idea of stars exploding from a gift a go. A tutorial from www.rosebakes.com gave me enough info to give it a go- minus the superman!

I made a fruit cake and covered it with marzipan.  I then added a layer of dark blue icing and a disc of teal icing on the top of that (only a couple of inches in diameter). I took a layer of white icing and randomly cut out 3 sizes of stars and set them aside to dry for a bit. I added the layer of white icing to the top- I really like the effect of seeing the blue through the cut out stars. I carefully cut a cross in the centre of the white icing and folded it back. I then cut a square of the teal icing into 4 and placed them into the folded area to give the impression of 2 layers of icing folded back. I measured, cut and added the teal ribbons (unfortunately one was slightly squiffy as I was a bit tired!). I cut 4 large stars from white icing and put them at the bottom of the ribbon base then I added some of the white stars I’d already cut out to the ribbons running across the cake (alternating 2 sizes). I put some teal sugar granules into the middle of the cake. I cut out some large stars and put them on bamboo skewers (I didn’t have time to go and get something more colour coordinated so I had to work with my stash). I then spent ages threading stars on wire and adding them to the explosion (in the middle I used longer wires with larger stars at the base through to the smallest at the top. Then I had lots of smaller wires with single stars- getting smaller as they moved out) I added a few left over stars to the sugar at the base. It took me ages but I was pleased with the result…..it tastes good as well 🙂

Creative loops exploding stars cake

That is my new technique in a new creative area- an exploding birthday gift! I’d like to enter the following challenges

Creative Loops- new

Decorate to celebrate- anything goes

Get Creative Challenges- something new

We Love To Create- anything creative/ mixed media goes

Craft for the Craic- January Blues


Minecraft card- new layout and new style

Minecraft card- new layout and new style

Creative loops challenge newThe theme for the Creative Loops challenge this month is New. In this card I have tried a new card fold and style. It is a bit out of my comfort zone and I always struggle a bit more with male birthday cards. I CASED (Copy And Share Everything) this card from Pinterest, originally pinned from SouthShoreStamping.

I made the card using Kraft card and also used it to mat the Creeper.


I created the backing paper and creeper by scoring/ embossing lines every mm across the green and black card both vertically and horizontally. I used Promarkers to colour the green squares on the creeper and cut the eyes and mouth from the black card. I mounted the eyes and mouth on foam pads.

Creative loops minecraft card

I made a matching backing paper for the inside using Craft Artist 2. I used the Minecraft font- love it!

Creative loops minecraft card2

Finally a look at the card standing up.

Creative loops minecraft card3

I’d like to enter the following challenges

Creative Loops Challenge- New (JFF)

Cardz 4 Guys- Happy Birthday

613 Avenue Create- Anything goes with an optional twist of birthday/ anniversary

Crafting When We Can- Something New

Craft Rocket Challenges- Happy Anything


Thanks for reading.


New year, new Creative Loops challenge….new!

New year, new Creative Loops challenge….new!

Creative loops challenge new
Hi! I am starting the year with a new challenge. The Creative Loops challenge is for all types of creatives and is truly anything goes- art, mixed media, sewing, knitting, card making, papercraft, crosstitch, photography, altered art, creative writing, graphic design……if it is creative and inspired by the challenge theme you can join in. The idea is to connect and inspire creatives. We are a local group that meet weekly but anyone is welcome to join the challenge and link up their project.

I was hoping to get this posted at the start of the year but I’ve been struggling with a virus over the last couple of months and just wasn’t up to posting. The challenge for this month is New. This could be a creative project for

  • NEW year
  • NEW year resolutions
  • NEW beginnings
  • NEW baby
  • NEW home
  • NEW life together (wedding)
  • NEW moon
  • NEW Zealand, NEW York, NEW Orleans etc.
  • NEW journal
  • use something NEW in your stash- get going with those Christmas gifts
  • trying a NEW technique or even a NEW craft

Feel free to add any ideas and to chat about inspirations in the comments. Here are some links to inspire you (I’ve also added lots of inspiration on my Pinterest boards).

Please add your finished projects at the bottom of this post.

New Year Parties and celebrations

Celebrating New Year in Britain from Project Britain
Great cake. Source: cakecentral

New Year Traditions

Lots of fire and fireworks but also animal whispering and possum dropping!

Great balls of fire in Scotland
Wearing red lingerie for luck in Turkey
Animal whispering in Romania
Take your suitcase for a walk!

Read about these and more strange New Year traditions at the Telegraph.

New Year Resolutions

Did you have a resolution- why not make something to remind you of it throughout the year.

source: http://www.jessicazoob.com/blog/
Source: http://taytayhser.blogspot.co.uk

New Beginnings

Sometimes you just need to step back and press reset. Source: http://www.rosiesandz.com
Source: https://www.bloglovin.com/blogs/get-motivation
Source: http://blog.freepeople.com

New Baby


Scrapbook page source: http://waltzingthroughlife.blogspot.ca
Try mixing knitting and card making


Exploding card design from traceyspapercraftcreations.blogspot.com
Free knitting patterns for babies at http://www.loveknitting.com/knitting-patterns-for-babies
From http://www.favequilts.com/

New Home

Tutorial for making little houses by Red Hen Home at Town n country living
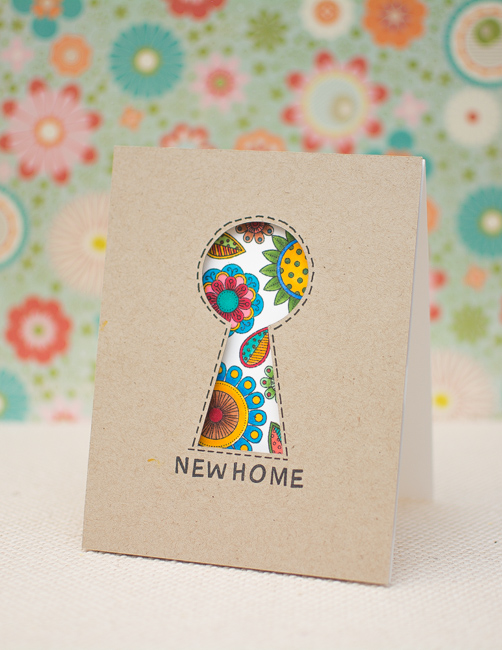
Clean and simple new home card from https://mayholicraft.wordpress.com/
Sew a new home gift or just something for your home source: http://lilluna.com

New Technique or Craft

Try something different.

Arm knitting projects from http://www.diyncrafts.com/
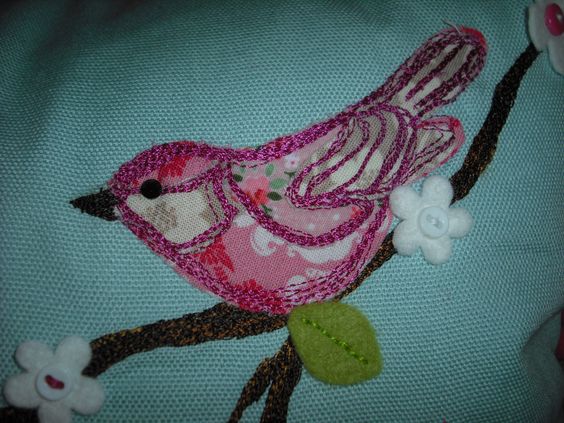
Free motion applique
Creating acrylic skins
Try art journalling http://artjournalist.com/

A mix of ideas to inspire you but do head over to my Pinterest boards if you want more. Now all you need to do is

  1. Get inspired
  2. Create (original and new creations only, please respect copyright)
  3. Take photos of your creation
  4. Link up
  5. Check out the other linked projects, comment on them etc. We want to build a community.

If you have a blog please write about your inspiration, how it links to this challenge and include a link to this post. Add a photo of your project with your name and a short description below. If you do not have a blog post you can upload and share your photo or email me a copy of the photo and details. If you have any problems linking up there is a how to video and tutorial here.

my email


 Loading InLinkz ...

Sun, sand, sea and Wee Goldie the mermaid!

There are lots of inspiring summer challenges at the moment so I decided to use my Goldie digi stamp by Sylvia Zet at Wee stamps for a summer themed card. Unfortunately this shop seems to be down at the moment but an alternative is to get the rubber stamp or buy the topper at Hobby House. I created a background for the image using Craft Artist 2 with sea in the circle and sand outside it in the square.

GoldieWeeStampMermaidCard

I coloured the image using Promarkers. I pushed myself to try some different colours and I like how it turned out.

Hair: Honeycomb, ginger, spice and terracotta

Skin: Ivory, blush, dusky pink, tea rose

Tail: Amber, pumpkin, orange, burnt orange

Flowers: Artic blue, sky blue

Hearts: Antique pink, ruby

Snail: Blush, dusky pink, putty, tan

Bubbles: Aquamarine, soft aqua, turquoise

I added some highlights to the hair using Letraset metallic red gold and to the bubbles with Letraset metallic green and Sakura Stardust green star. Finally I covered each bubble using Sakura Stardust clear star.

GoldieWeeStampsMermaidCard2

I created the background paper and sentiment using Craft Artist 2. I used digital starfish embellishments to match my theme. I edged the papers using Promarkers and matted them onto plain yellow card. The sentiment looks like a sign on weathered wood with chalk writing. I curled the sentiment to make it ‘pop’ and added pearl embellishments.

I would like to enter the following challenges

Pinspirational challenge– I used the colours from the photo to colour my digital papers and designed my sentiment to look like one of the signs on wood.

Crafty sentiments challenge– sketch

City crafter challenge blog– mood board inspired my sand paper and starfisk embellies

The house that stamps built- Sun sand and surf

Passion for Promarkers- Fun in the sun

Crafty boots challenge- Life’s a beach

Eureka stamps challenge- Hot, hot, hot

Incy wincy designs- Sea, sun and sand

Thanks for popping by.


Diamonds and pearls- Hepbern dress

Hi!

This card is full out girly- diamonds, pearls and lace!  I used the beautiful image Hepbern dress by A Day for Daisies.

Hepburn dress  Day for Daisies

I coloured the image with Promarkers, Collectors ProMarkers and flexmarkers (Hair: canary, sunflower, yellow, vanilla. Skin: Almond, putty, dusty pink, tea rose. Dress: Duck egg, oasis, honeydew, aquamarine). I painted some highlights onto the dress using pearlescent waterfall green acrylic ink.

I used Craft Artist 2 to make the image background and background paper. I made them both by sampling the colours from the Our Daily Bread Colour challenge.

I used my Cougar electronic cutter to etch a frame design on lilac pearlescent card. I used Spun Sugar Distress Sticklesto outline the frame design and around the outside of the card.

Hepburn dress a day for daisiesI created the digital backgound paper featureing a lace ribbon, strings of pearls, glitter and diamond and pearl embellishments. I colour matched these for the ODB challenge. I created a mathing paper for the inside.

Hepburn4

I would like to enter this card for the following challenges. Please do go over and check out all the wonderful inspiration there.

Paper Minutes- Lyrics I went with Diamonds and Pearls by Prince
Top Tip Tuesday- Ribbon & Pearls (gutted this is the last challenge as I love this blog)
Incy Wincy Designs- Frame It (always good to have a frame around an image)
Lost Coast Designs – Circles
Perfectly Rustics-Anything Goes With Glitter
Whoopsi Daisy- Make it Girly

Diamond fold Christmas card

This is the design I used for all my Christmas cards last year but unfortunately I forgot to take photos so I could blog them! I thought I’d make another one while I still remembered how I did them!

I made the card base using 12 by 12 inch pearlescent card. I cut this at 4 and 8 inches so I could make three cards. I used this tutorial at splitcoaststampers on making diamond fold cards and scored it using my Big Score Scoring Board. This is the folded, front  and rear views.

diamond fold christmas1

diamond fold christmas3

diamond fold christmas4

I used an old image, papers, card and a stamp which were all from magazines and unfortunately I have no idea which magazines or the designers. I also used old ribbon and punches. I added new adhesive pearls and coloured them with a metallic red Promarker.

diamond fold christmas2I used corner punches on my layers under the image. I used a holly punch and added more adhesive pearls coloured with a metallic red Promarker as berries.

diamond fold christmas6I stamped and embossed the sentiment image onto card which I cut with a scallop edge circle punch.

I made a box envelope with card from this lushFirst Edition Scrapbook Paper Pad- Love Letters.

diamond fold christmas7

If you’re interested in trying out different card types and folds you might want to check out my Pinterest board with them.

I’d like to enter this card to the following challenges

Creatilicious Challenges- more than one fold

Whimsy stamps inspiration challenge- Christmas in summer

Crafting when we can- ribbon, twine, washi taps or a combination of the three

Paper creators crafts- dies and/or punches

SLS lines challenges- Christmas or creepmas in summer


Summer hydrangea card using watercolour

I’ve been through one of those patches where I’m creating lots but never get round to blogging it! I’ve used clever group of hydrangea stamps by inkylicious which allow you to build up an image. I stanped using distress inks.

I have all the Zig art and graphic twin ZIG Art and Graphic watercolour markers and I used various pinks, purples and greens to watercolour. I used my trusty marble heart as my pallette rather than applying the ink directly.

Watercolour hydrangea 2

I made the background papers and sentiment using Craft Artist 2. Lots of lovely purples! I matted the layers with platinum silver Centura Pearl card.

Watercolour hydrangea 1

As you can see I rounded all the corners with a Corner Punch. I used my round Ranger blending tool (I’m finding this so much easier to get a smooth blend compared to the rectangular one) with Victorian Velvet distress ink to add a hint of colour to the card scallop edges.

Inside the card I used more papers I made up in Craft Artist 2. I forgot to take photos before I wrote in it so I’ve blurred my writing out 🙂

Watercolour hydrangea 3

I would like to enter my card for the following challenges

That’s Crafty- purple passion challenge

Chocolate, coffee and cards challenges- a flower in your image

Penny Black and more challenge- summer flowers

Lacy Sunshine’s colour your world- anything goes

Whoopsie Daisy challenge- make it girly

Thanks so much for reading and commenting x